Blood VFX: How to Create Realistic Injury Effects for Film + Production Guide
Blood VFX separates amateur horror from believable cinema. A poorly executed blood effect—wrong color, unnatural flow, unconvincing splatter—breaks immersion instantly. Professional blood VFX is subtle, realistic, and contextually appropriate.
This guide covers the complete blood VFX workflow for filmmakers: from practical on-set choices through digital enhancement, compositing techniques, and where to source professional blood effect bundles for post-production.

Why Blood VFX Matters for Cinematic Production
Blood is unavoidable in film. It appears in:
- Horror/thriller: Gore, injuries, supernatural effects
- Crime drama: Murder scenes, forensic detail
- Action films: Gunshot wounds, fight choreography
- War/historical: Battle sequences, trauma
- Medical/procedural: Surgery, medical emergencies
- Supernatural: Possessed characters, demonic effects
The Problem: Fake Blood Looks Worse Than No Blood
Many independent filmmakers avoid blood effects entirely because:
- ❌ Practical on-set blood looks cheap or cartoony
- ❌ Digital blood is hard to composite believably
- ❌ Wrong color/viscosity feels obviously fake
- ❌ Audiences immediately notice amateur effects
Solution: Combine practical on-set blood (where visible) with digital enhancement (for impossible shots, extreme closeups, complex effects). Professional production uses both.
Why Realistic Blood Matters
Believable blood creates:
- Emotional weight: Tragedy lands harder if blood looks real
- Horror impact: Shocking moments are shocking because details are visceral
- Credibility: Audiences accept the narrative when effects don't break immersion
- Awards consideration: Technical excellence (including blood VFX) matters in film festivals
Conversely, obviously fake blood:
- Pulls viewers out of the story ("that looks digital")
- Undermines emotional moments
- Makes the film look low-budget
- Suggests careless production
Blood VFX Technique Types: Practical vs. Digital
Practical On-Set Blood (What You Film)
Realistic practical blood uses stage blood that's:
- Correct color (darker red than you'd expect, brown undertones)
- Realistic viscosity (flows like actual blood, not corn syrup)
- Safe for actors (non-toxic, easy to clean)
- Visible on camera (doesn't wash out under lighting)
Common applications:
- Visible wounds/cuts
- Blood on hands/clothing
- Small splatters
- Continuous bleeding (blood running down face, etc.)
Why practical blood:
- Actors feel real blood on them = more authentic performance
- Lighting is real (no compositing challenges)
- Movement is unpredictable (looks more genuine than digital)
- Visible on camera (what audience sees is actually there)
Limitations of practical blood:
- ❌ Can't do extreme closeups (practical blood doesn't have detail like real blood vessel texture)
- ❌ Can't do impossible angles (blood defying gravity looks fake on camera)
- ❌ Can't repeat exactly (each take is different, continuity issues)
- ❌ Can't do complex composites (blood on video backgrounds, multiple layers)
Digital Blood VFX (Post-Production)
Digital blood is composited in post via:
Method 1: Overlaying Pre-Rendered Blood Footage
- Download blood effect video files
- Composite over actor/scene footage
- Blend with color correction and transparency
- Layer multiple blood effects for complex scenes
Example workflow:
- Film actor with wound makeup (no blood)
- In post, layer blood VFX video over the wound
- Blend with color correction to match lighting
- Add additional splatters, drips, detail
Method 2: Particle Systems & Simulation
- Use After Effects or Blender to create blood particles
- Simulate splatter, spray, or flow
- Full customization (amount, velocity, direction, color)
- Extremely flexible but time-intensive
Method 3: Hybrid Practical + Digital
- Practical blood on set (visible on actor)
- Digital enhancement in post (add detail, extend, emphasize)
- Combines authenticity of practical with flexibility of digital
Why digital blood:
- ✅ Perfect control (exact color, amount, timing)
- ✅ Compositable (layer with impossible backgrounds)
- ✅ Repeatable (same effect across multiple takes)
- ✅ Complex effects (splatter patterns, spray, supernatural blood)
- ✅ Extreme closeups (digital blood has detail)
Limitations:
- ❌ Requires compositing skill
- ❌ Time-intensive (30 min - 2 hours per shot)
- ❌ Can look artificial if not color-matched
- ❌ Expensive (either software costs or hiring VFX artist)
Blood VFX Bundle Types (5000+ Asset Library)
Platforms with comprehensive VFX libraries organize blood effects into:
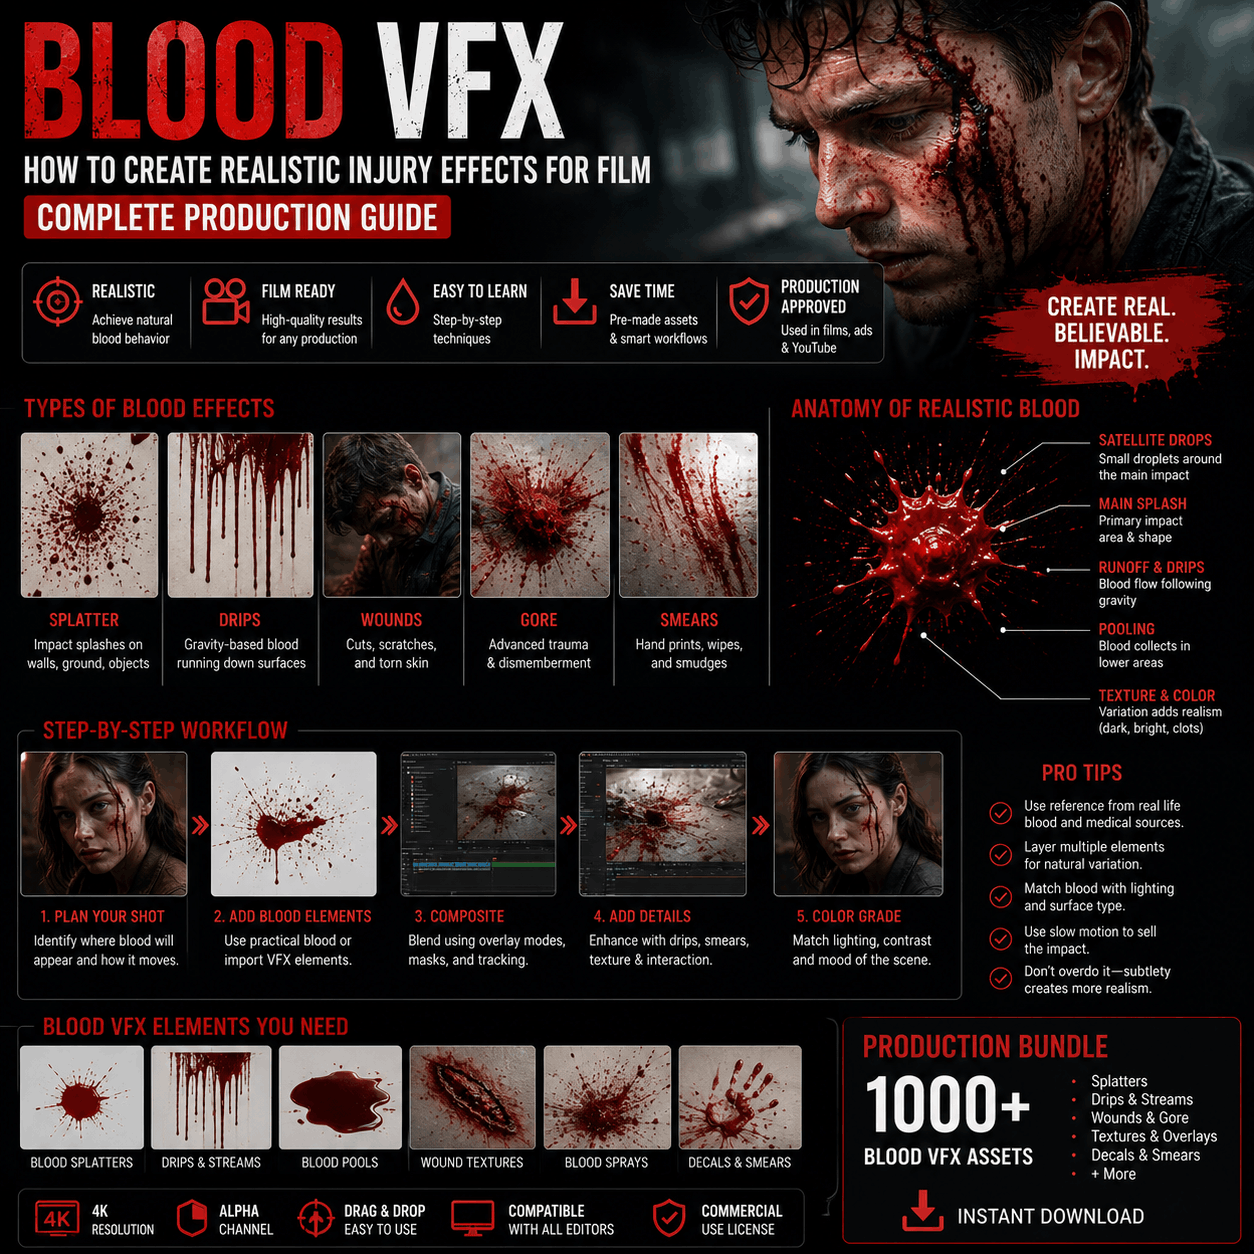
1. Blood Splatter & Impact Packs
What they include: Instant blood splatter effects—what happens when blood hits a surface.
Variations:
- Wall splatters (impact onto flat surface)
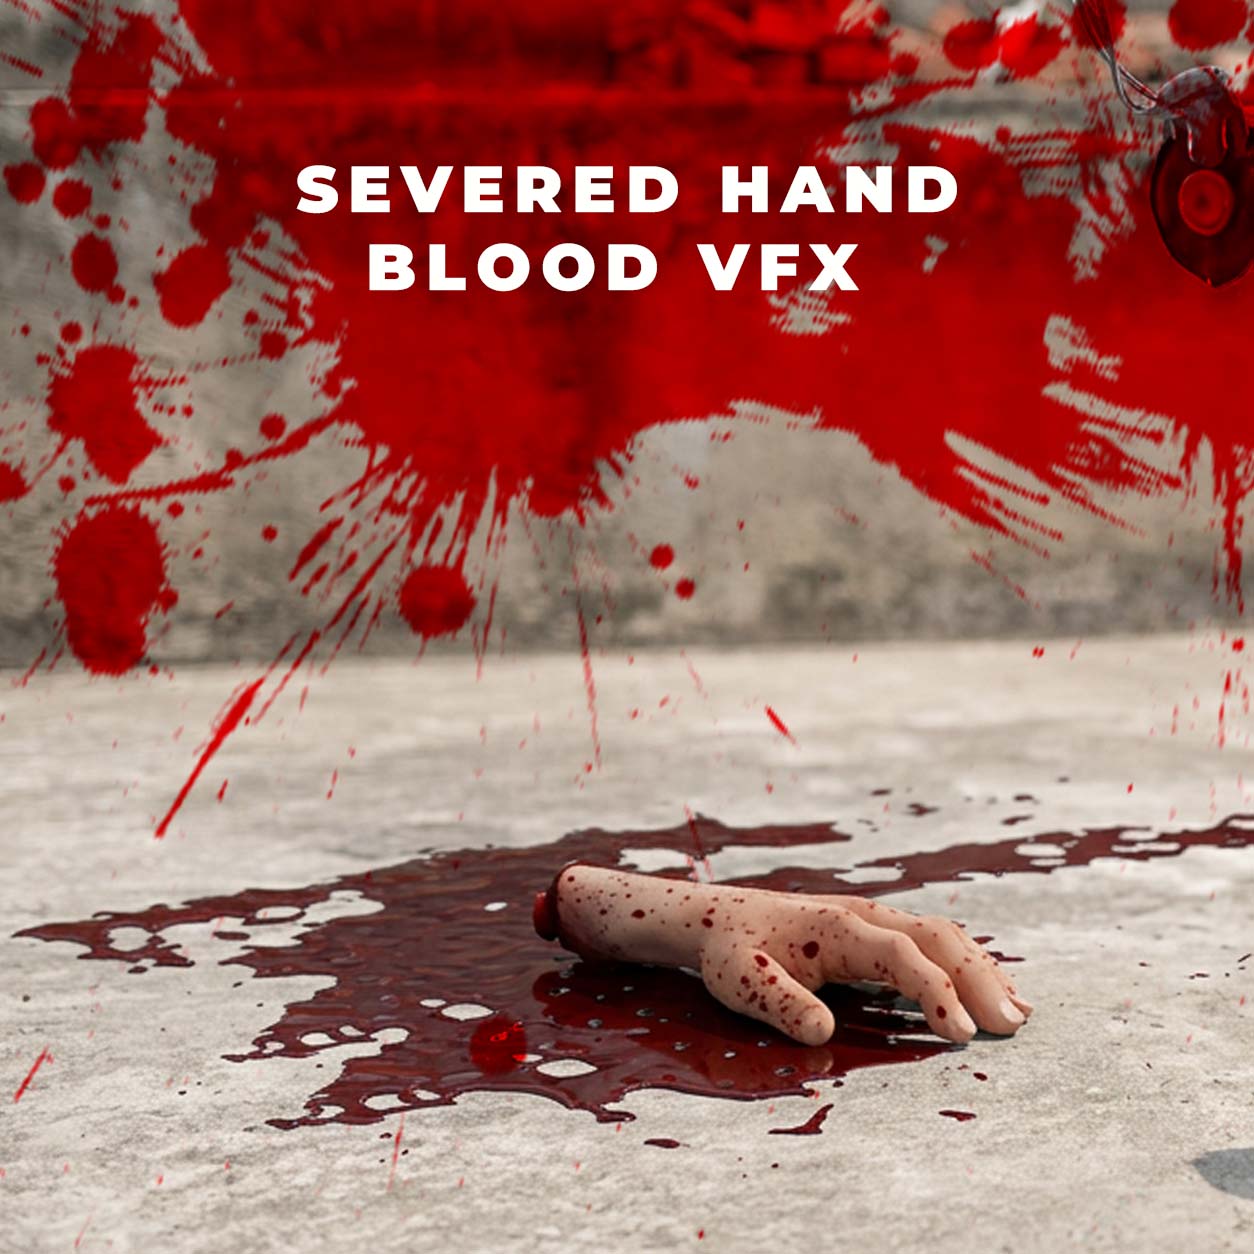
- Ground splatter (blood falling to floor)
- Arterial spray (high-pressure blood spray pattern)
- Splatter combinations (multiple impacts, chaotic splatter)
- Intensity variations (small splatter to extreme gory effects)
File formats:
- MOV with alpha (transparent background, blend into scene)
- MP4 (for reference, lower quality)
Resolution: Typically 1080p-4K
Bundle size: 20-30 splatter variations per pack
Best for: Impact moments (gunshot, melee wound, trauma)
Professional note: Different impact types look different:
- Blunt force trauma: Large splatter, irregular pattern
- Penetrating wound: Fine spray (arterial) + drip
- Cutting wound: Slower blood flow, less splatter
- Supernatural: Unusual colors, impossible physics
Quality bundles include variations for each impact type.
2. Blood Flow & Drip Packs
What they include: Blood flowing, dripping, or running—continuous bleeding.
Variations:
- Face drip (blood running down face)
- Hand flow (blood flowing down hand/arm)
- Torso bleeding (blood soaking through clothing)
- Pool formation (blood collecting on ground)
- Streaking (blood trails, smears)
Why important: Impact blood lasts seconds. Flowing blood sustains emotional weight across a scene.
Bundle size: 15-25 variations per pack
Best for: Establishing injury severity, building tension, character trauma
Professional note: Blood flow is physics-driven:
- Flows downward (gravity is real)
- Slows over time (blood coagulates)
- Color changes with time (oxidizes, darkens)
- Moves with actor movement (realistic interaction)
3. Arterial Spray & Wound Packs
What they include: High-pressure blood spray (from major arteries) and detailed wound effects.
Variations:
- Arterial spray (violent, high-velocity spray pattern)
- Carotid spray (neck wound, distinctive spray direction)
- Femoral spray (leg wound, characteristic pattern)
- Surgical wound (controlled, less splatter)
- Infected wound (discolored, pus, decay)
Why distinct: Arterial spray is distinctive and immediately readable as serious/life-threatening injury. Non-professionals don't understand the visual difference, but audiences subconsciously register "this is bad."
Bundle size: 10-20 specialized variations per pack
Best for: Horror, graphic action, high-stakes trauma scenes
Warning: Extremely graphic. Use for R/unrated film only.
4. Supernatural & Fantasy Blood Packs
What they include: Stylized blood for non-realistic contexts (vampires, demons, aliens, magic).
Variations:
- Colored blood (black, red, glowing, otherworldly)
- Supernatural splatter (defies physics, magic-infused)
- Demonic blood (smoky, particle-heavy, unnatural)
- Vampire blood (thick, viscous, supernatural properties)
- Alien blood (acid, glowing, destructive)
Why separate: Realistic blood is wrong for fantasy. Supernatural blood signals "this isn't human, this is otherworldly."
Bundle size: 15-25 variations per pack
Best for: Horror, fantasy, superhero films, creature effects
5. Forensic & Detail Packs
What they include: Subtle, realistic blood details (not dramatic splatter, but forensic accuracy).
Variations:
- Blood spatter pattern (CSI-style accuracy)
- Bloodstain pattern (indicates impact angle, forensic detail)
- Trace blood (small amounts, high detail)
- Dried blood (color shift, realistic aging)
- Blood evidence (what forensic teams photograph)
Why important: Drama and procedural content uses forensic detail for realism. Incorrect blood patterns feel wrong to audiences who watch crime shows.
Bundle size: 20-30 detailed variations per pack
Best for: Crime drama, procedurals, forensic-accurate content
Blood VFX Compositing Workflow
Step 1: Assess Your Footage
Before applying blood VFX, analyze:
- Lighting direction: Where is light hitting the scene?
- Character position: Where on body is blood needed?
- Wound makeup: What's already applied practically?
- Background: Is background simple or complex?
- Color grading: What's the scene's color palette?
Step 2: Choose Blood Effect Type
Match your shot to appropriate bundle:
- Wide shot of actor: Small splatter, maybe drip (viewer too far to see detail)
- Medium shot: Standard splatter, flow effects
- Closeup on wound: Detailed blood, arterial spray, sophisticated effects
- POV shot (looking at wound): Maximum detail, extreme closeup blood
Step 3: Import Blood VFX Footage
In After Effects:
- Import blood effect MOV file (should have alpha channel/transparency)
- Create new layer above footage
- Paste blood effect at appropriate timing
- Position effect where wound is located
Step 4: Blend & Color Correct
This is where it gets professional:
Transparency blending:
- Adjust opacity (100% = opaque, 50% = semi-transparent)
- Use blend modes (typically "Screen" or "Add" for light, "Multiply" for dark)
- Feather edges if needed (blood that fades into scene)
Color matching:
- Sample color from actor's skin/clothing
- Apply color correction to blood effect to match scene lighting
- Use curves or levels to match blood brightness
- HSL adjustment to match undertones (warm/cool)
The hardest part: Making digital blood match the scene's color grade. A cool-toned scene needs cool-toned blood. A warm-toned scene needs warm blood. Mismatch is immediately obvious.
Step 5: Layer Additional Details
Professional composites layer:
- Base splatter effect (primary blood)
- Drip/flow effects (secondary bleeding)
- Trace/splatter details (fine specks, realism)
- Color correction adjustment layer (unified color across all blood)
3-5 layers of blood effects is typical for realistic, complex wounds.
Step 6: Add Practical Integration
If you filmed practical blood on set:
- Layer digital blood over practical blood
- Use digital to extend or emphasize practical
- Digital adds detail practical blood lacks
- The combination looks most realistic
Step 7: Sound Design
Blood is silent but feels wrong without sound. Add:
- Drip sounds (water drops, subtle)
- Splatter sound (wet impact, brief)
- Actor breathing/reaction (sells trauma)
- Absence of sound (silence is sometimes right)
Professional Blood VFX Dos and Don'ts
✅ DO: Match Color to Lighting
Blood color changes based on lighting:
- Under warm lighting: Darker, more brownish
- Under cool lighting: Brighter red tones
- Under low light: Almost black
- Under high light: Bright, saturated red
Sample and color-correct blood to match your scene's dominant color temperature.
✅ DO: Vary Blood Intensities
Don't use same blood intensity everywhere:
- Small drops (edges, trace amounts)
- Medium splatter (primary wound)
- Heavy flow (arterial spray, extreme injury)
Variation = realism.
✅ DO: Consider Practical Constraints
Real blood:
- Flows downward (gravity)
- Slows over time (viscosity)
- Oxidizes/darkens (chemistry)
- Interacts with surface (absorbent vs. shiny)
Effects that violate physics look wrong, even if viewers can't articulate why.
❌ DON'T: Use Same Blood Effect in Multiple Shots
Each wound is different:
- Different wound type (splatter vs. flow)
- Different location (face vs. chest)
- Different impact (blunt vs. sharp)
- Different intensity (minor cut vs. arterial spray)
Reusing same blood effect signals "budget constraints," not realism.
❌ DON'T: Ignore Alpha Channel
Blood effects without proper alpha channel:
- Have black/white background (can't composite cleanly)
- Look like overlays (don't blend into scene)
- Have hard edges (obviously digital)
Always use MOV files with alpha channel, not flattened MP4s.
❌ DON'T: Over-Blend Blood
A common mistake: Making blood too transparent so it "blends" into scene.
Actually, blood should be visible but integrated:
- Opacity 80-100% (blood is opaque)
- Color-matched to scene (so it doesn't look out of place)
- Properly positioned (not obviously floating over scene)
❌ DON'T: Forget Continuity
Blood continuity is critical:
- Where blood is in shot A must be consistent in shot B
- Blood can't magically increase/decrease between cuts
- Dried blood should look older than fresh blood
Continuity errors break immersion as much as bad VFX.
Blood VFX for Different Film Genres
Horror Films
Approach: Graphic, impactful, disturbing
Bundle strategy:
- Arterial spray packs (violence is visible)
- Supernatural blood packs (if creatures/demons)
- Extreme splatter (no holds barred)
- Sound design integration (wet, visceral audio)
Philosophy: More is more. Horror audiences expect gore.
Crime Drama & Procedurals
Approach: Realistic, forensic-accurate, subtle
Bundle strategy:
- Forensic blood packs (accurate patterns)
- Realistic flow and drip (visible but not gratuitous)
- Minimal splatter (crime scenes have details, not drama)
- Aging/dried blood (shows time passage)
Philosophy: Accuracy over sensationalism. Audiences of crime shows know blood.
Action Films
Approach: Impactful but not gratuitous, stylized realism
Bundle strategy:
- Splatter packs (gunshots, melee combat)
- Arterial spray (establish severity without dwelling)
- Quick transitions (blood is part of action, not focus)
- Practical blood on stunts (real blood on stunt performers)
Philosophy: Blood emphasizes impact without lingering. Moves with action pace.
Prestige Drama
Approach: Minimal, intentional, emotionally weighted
Bundle strategy:
- Subtle blood packs (less is more)
- Realistic flow (tragedy conveyed through realism)
- Minimal splatter (focus on emotion, not gore)
- Color-graded integration (seamless, not obvious VFX)
Philosophy: Blood is emotional, not spectacle.
Superhero/Fantasy
Approach: Stylized, supernatural, genre-appropriate
Bundle strategy:
- Supernatural/colored blood packs
- Physics-defying effects (magic-infused blood)
- Dramatic splatter (emphasizes power)
- Fantasy-style wounds (costume/character-appropriate)
Philosophy: Blood style matches genre tone (not realistic, but consistent).
Common Blood VFX Mistakes
❌ Mistake 1: Wrong Blood Color
Problem: Blood too bright red (looks artificial) or wrong tone (cool when scene is warm).
Solution: Sample scene color, color-correct blood to match. Test on different monitors.
❌ Mistake 2: Unnatural Physics
Problem: Blood flowing upward, defying gravity, or not interacting with surfaces realistically.
Solution: Watch real footage of bleeding. Understand gravity, viscosity, flow dynamics.
❌ Mistake 3: Over-The-Top Amount
Problem: A paper cut has arterial spray, a gunshot has barely visible blood.
Solution: Match blood intensity to wound severity. Scale appropriately.
❌ Mistake 4: Same Blood Effect Everywhere
Problem: Every wound uses identical splatter (obvious reuse).
Solution: Download bundle with variations. Use different effects for different wounds.
❌ Mistake 5: Ignoring Compositing Details
Problem: Blood obviously floating over scene (no depth integration, wrong shadows).
Solution: Color correct, add shadows, position carefully. Spend time blending.
❌ Mistake 6: No Sound Design
Problem: Blood VFX is silent but looks wrong without audio reinforcement.
Solution: Add subtle splatter sounds, drips, breathing/reaction from actor.
Blood VFX Budget Considerations
Free Approach
- DIY practical blood on set (corn syrup, food coloring, etc.)
- Minimal digital enhancement
- No purchased VFX bundles
- Very time-intensive post-production
Cost: $0 + 20-50 hours per scene
Budget Approach (Low-Cost VFX)
- Practical blood on set (safer, more realistic than DIY)
- Light digital enhancement
- Download 1-2 affordable blood bundles ($10-30)
- 5-10 hours post-production per scene
Cost: $50-100 for bundles + 10-20 hours labor
Professional Approach
- Practical blood on set (professional stage blood)
- Comprehensive digital enhancement
- Access to 5000+ blood effect variations
- 5-15 hours post-production per scene
Cost: $100-300 for full library + 10-15 hours labor
Hire VFX Artist
- Artist handles all compositing
- Professional-grade results
- 20-40 hours per scene (artist does heavy lifting)
- Expensive but results are top-tier
Cost: $2000-5000 per complex scene
Conclusion: Blood VFX Separates Amateur from Professional
Blood VFX is often the difference between "looks low-budget" and "looks professional." Audiences don't consciously notice good blood VFX, but they immediately notice bad blood VFX.
Professional approach:
- Use quality practical blood on set (when visible)
- Plan shots that leverage digital effects (closeups, extreme angles)
- Download specialized bundles matching your film's tone
- Spend time color-correcting and blending blood effects
- Add sound design to reinforce blood moments
- Test across multiple monitors before finalizing
The 5000+ asset libraries available today mean you never have to settle for "that looks obviously digital" blood. Download bundles covering your specific needs (horror, crime drama, action, etc.), and your blood VFX will match professional standards.
Next step: Define your film's tone and violence level, then download blood effect bundles matching that genre (forensic for crime, graphic for horror, stylized for superhero). Test on a short scene before committing to full production.

 Premium Plans